Python3 爬虫学习笔记第十一章 —— 【MongoDB数据储存】
【11.1】关于 MongoDB MongoDB 属于非关系型数据库,即 NoSQL(Not Only SQL),NoSQL 是基于键值对的,不需要经过 SQL 层的解析,数据之间没有耦合性,性能极高,非关系型数据库分为以下几种:
键值存储数据库:Redis、Voldemort、Oracle BDB 等;
列存储数据库:Cassandra、HBase、Riak 等;
文档型数据库:CouchDB、MongoDB 等;
图形数据库:Neo4J、InfoGrid、Infinite Graph 等。
【11.2】MongoDB 基本操作语句 1 2 3 4 5 6 7 8 9 10 11 12 13 14 15 16 17 18 19 20 21 22 23 24 25 26 27 28 29 30 # 创建数据库(如果数据库不存在就创建数据库, 存在就切换到指定的数据库) use DATABASE_NAME# 查看所有数据库 show dbs# 查看当前所在数据库 db # 删除当前数据库 db.dropDatabase() # 删除集合 db.COLLECTION_NAME.drop() # 创建集合 db.createCollection("COLLECTION_NAME" ) # 插入文档 db.COLLECTION_NAME.insert(document ) db.COLLECTION_NAME.save(document ) # 更新文档 db.COLLECTION_NAME.update() # 删除文档 db.COLLECTION_NAME.remove() # 查询文档 db.COLLECTION_NAME.find(query , projection)
【11.3】连接 MongoDB 连接 MongoDB 需要导入 pymongo 库,使用 MongoClient() 方法,向其传入地址参数 host 和 端口参数 port 即可
1
2
3
import pymongoclient = pymongo.MongoClient(host='localhost' , port=27017 )
也可以直接传入 MongoDB 的连接字符串:
1
2
3
import pymongoclient = pymongo.MongoClient('mongodb://localhost:27017/' )
【11.4】指定数据库 使用以下语句皆可指定一个名为 spiders 的数据库:
【11.5】指定集合 MongoDB 的每个数据库包含多个集合(collection),类似于关系型数据库 MySQL 中的数据表,使用以下语句皆可指定一个名为 students 的集合:
1 collection = db.students
1 collection = db['students' ]
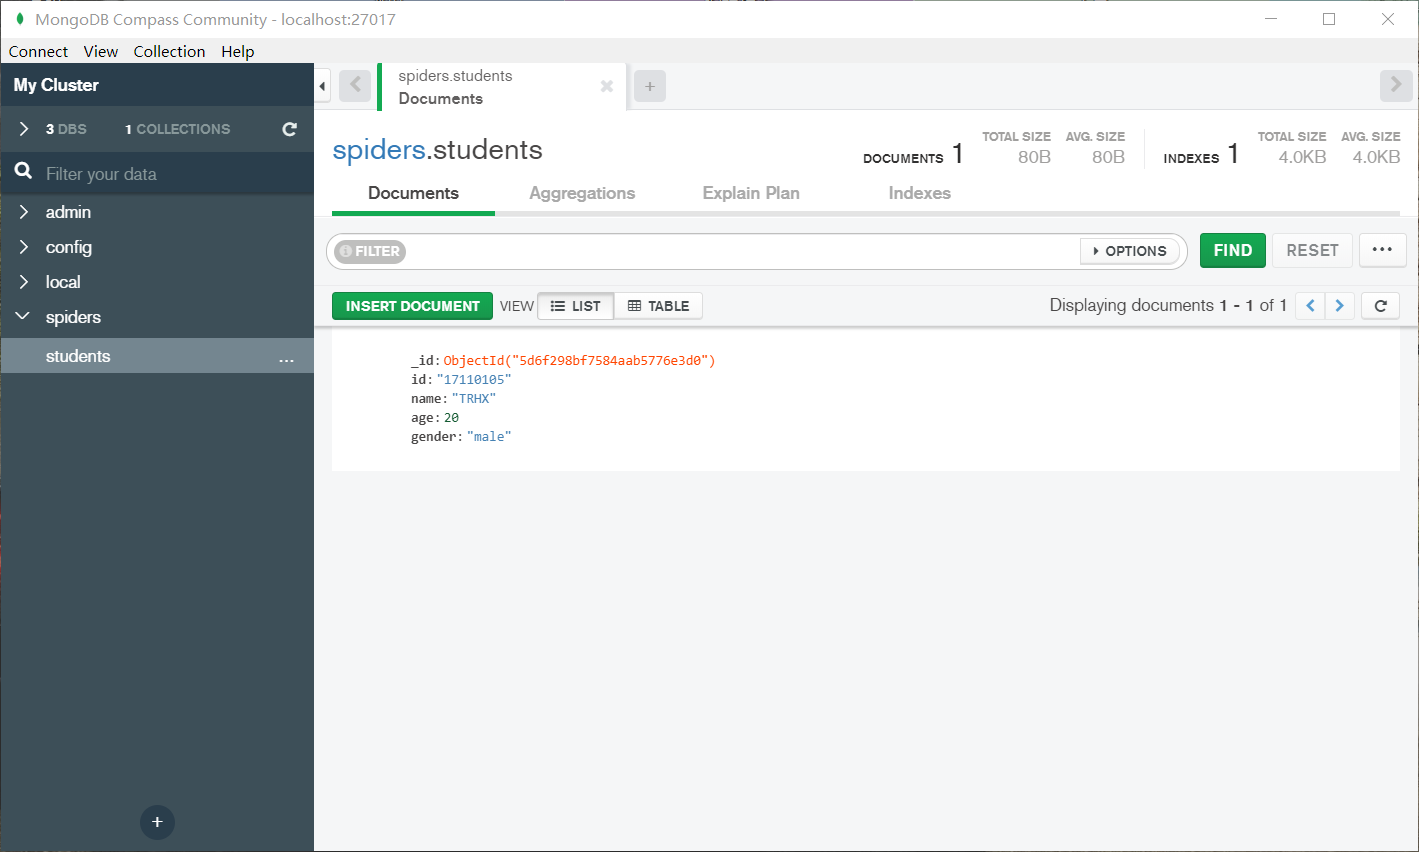
【11.6】插入数据 1 2 3 4 5 6 7 8 9 10 11 12 13 import pymongoclient = pymongo.MongoClient(host='localhost' , port=27017 ) db = client.spiders collection = db.students students = { 'id' : '17110105' , 'name' : 'TRHX' , 'age' : 20 , 'gender' : 'male' } result = collection.insert(students) print(result)
在 spiders 数据库的 students 集合里,新建一条学生数据,该数据以字典形式表示,调用 collection 的 insert() 方法插入数据,在 MongoDB 中,每条数据都有一个_id 属性来唯一标识。如果没有显式指明该属性,MongoDB 会自动产生一个 ObjectId 类型的_id 属性。insert() 方法会在执行后返回 _id 值,在 MongoDB 数据库里面可以看到已经成功插入数据,输出结果:
1 5 d6f1a4b57b65e1547bb3c24
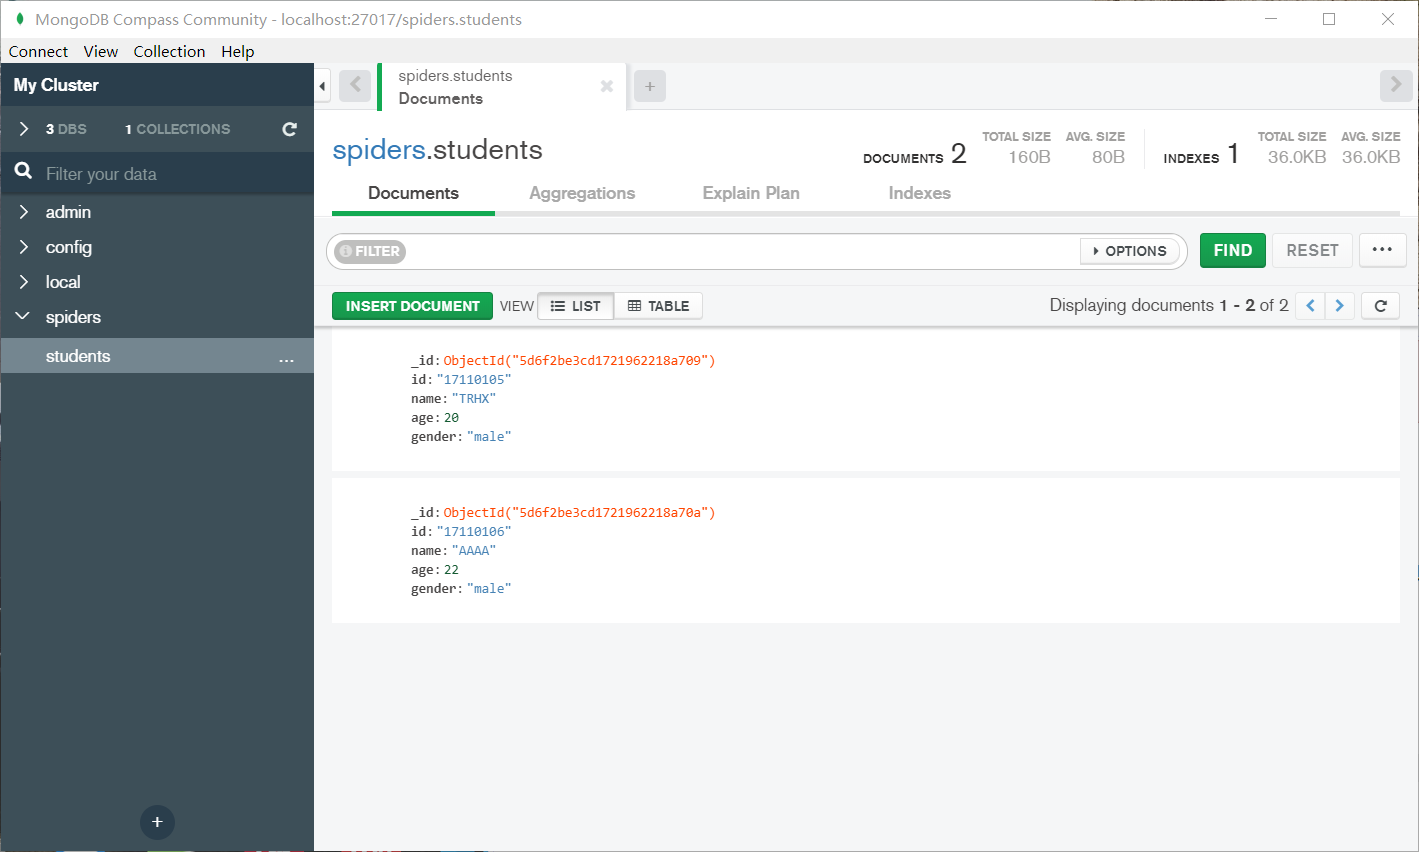
进阶操作:同时插入多条数据,以列表形式传递:
1 2 3 4 5 6 7 8 9 10 11 12 13 14 15 16 17 18 19 import pymongoclient = pymongo.MongoClient(host='localhost' , port=27017 ) db = client.spiders collection = db.students students1 = { 'id' : '17110105' , 'name' : 'TRHX' , 'age' : 20 , 'gender' : 'male' } students2 = { 'id' : '17110106' , 'name' : 'AAAA' , 'age' : 22 , 'gender' : 'male' } result = collection.insert([students1, students2]) print(result)
输出结果:
1 [ObjectId('5d6f2be3cd1721962218a709' ), ObjectId('5d6f2be3cd1721962218a70a' )]
PyMongo 3.x 及以上版本中,推荐使用 insert_one() 和 insert_many() 方法来分别插入单条记录和多条记录,示例:
插入单条记录
1 2 3 4 5 6 7 8 9 10 11 12 13 14 import pymongoclient = pymongo.MongoClient(host='localhost' , port=27017 ) db = client.spiders collection = db.students students = { 'id' : '17110105' , 'name' : 'TRHX' , 'age' : 20 , 'gender' : 'male' } result = collection.insert_one(students) print(result) print(result.inserted_id)
返回的是 InsertOneResult 对象,调用其 inserted_id 属性获取_id:
1 2 <pymongo.results.InsertOneResult object at 0x0000020ED91A5608 > 5 d6f73940fe700c5a7ac19f0
插入多条记录
1 2 3 4 5 6 7 8 9 10 11 12 13 14 15 16 17 18 19 20 import pymongoclient = pymongo.MongoClient(host='localhost' , port=27017 ) db = client.spiders collection = db.students students1 = { 'id' : '17110105' , 'name' : 'TRHX' , 'age' : 20 , 'gender' : 'male' } students2 = { 'id' : '17110106' , 'name' : 'AAAA' , 'age' : 22 , 'gender' : 'male' } result = collection.insert_many([students1, students2]) print(result) print(result.inserted_ids)
返回的类型是 InsertManyResult,调用 inserted_ids 属性可以获取插入数据的_id 列表:
1 2 <pymongo.results.InsertManyResult object at 0x0000021698DD36C8 > [ObjectId('5d6f68598fa881c69b2e0006' ), ObjectId('5d6f68598fa881c69b2e0007' )]
【11.6】数据查询 事先已经创建好 spiders 数据库和 students 集合,包含以下数据:
1 2 3 4 5 6 7 8 9 10 11 12 13 14 15 16 17 18 19 20 21 22 23 _id:ObjectId("5d6f95d40828142f1dc35fa5") id:"17110105" name:"TRHX" age:20 gender:"male" _id:ObjectId("5d6f95d40828142f1dc35fa6") id:"17110106" name:"AAA" age:20 gender:"male" _id:ObjectId("5d6f95d40828142f1dc35fa7") id:"17110107" name:"BBB" age:19 gender:"female" _id:ObjectId("5d6f95d40828142f1dc35fa8") id:"17110108" name:"CCC" age:22 gender:"male"
查询方法一:利用 find_one() 或 find() 方法进行查询, find_one() 查询得到的是单个结果,find() 则返回一个生成器对象
1 2 3 4 5 6 7 import pymongoclient = pymongo.MongoClient(host='localhost' , port=27017 ) db = client.spiders collection = db.students result = collection.find_one({'name' : 'TRHX' }) print(result)
查询 name 为 TRHX 的数据,返回一个字典类型:
1 {'_id' : ObjectId('5d6f95d40828142f1dc35fa5' ), 'id' : '17110105' , 'name' : 'TRHX' , 'age' : 20 , 'gender' : 'male' }
查询方法二:根据 ObjectId 查询,查询时需要使用 bson 库里面的 objectid:
1 2 3 4 5 6 7 8 import pymongofrom bson.objectid import ObjectIdclient = pymongo.MongoClient(host='localhost' , port=27017 ) db = client.spiders collection = db.students result = collection.find_one({'_id' : ObjectId('5d6f95d40828142f1dc35fa7' )}) print(result)
查询结果:
1 {'_id' : ObjectId('5d6f95d40828142f1dc35fa7' ), 'id' : '17110107' , 'name' : 'BBB' , 'age' : 19 , 'gender' : 'female' }
使用 find() 方法查询多条数据:
1 2 3 4 5 6 7 8 9 import pymongoclient = pymongo.MongoClient(host='localhost' , port=27017 ) db = client.spiders collection = db.students results = collection.find({'gender' : 'male' }) print(results) for result in results: print(result)
find() 方法返回一个生成器对象,遍历得到所有数据,每条数据都是字典类型:
1 2 3 4 <pymongo.cursor.Cursor object at 0x00000191F69AAA90 > {'_id' : ObjectId('5d6f95d40828142f1dc35fa5' ), 'id' : '17110105' , 'name' : 'TRHX' , 'age' : 20 , 'gender' : 'male' } {'_id' : ObjectId('5d6f95d40828142f1dc35fa6' ), 'id' : '17110106' , 'name' : 'AAA' , 'age' : 20 , 'gender' : 'male' } {'_id' : ObjectId('5d6f95d40828142f1dc35fa8' ), 'id' : '17110108' , 'name' : 'CCC' , 'age' : 22 , 'gender' : 'male' }
在查询条件中加入比较符号进行查询,以下代码实现了年龄大于等于20的数据查询:
1
2
3
4
5
6
7
8
import pymongoclient = pymongo.MongoClient(host='localhost' , port=27017 ) db = client.spiders collection = db.students results = collection.find({'age' : {'$gte' : 20 }}) for result in results: print(result)
符号 $gte 表示大于等于,查询结果如下:
1 2 3 {'_id' : ObjectId('5d6f95d40828142f1dc35fa5' ), 'id' : '17110105' , 'name' : 'TRHX' , 'age' : 20 , 'gender' : 'male' } {'_id' : ObjectId('5d6f95d40828142f1dc35fa6' ), 'id' : '17110106' , 'name' : 'AAA' , 'age' : 20 , 'gender' : 'male' } {'_id' : ObjectId('5d6f95d40828142f1dc35fa8' ), 'id' : '17110108' , 'name' : 'CCC' , 'age' : 22 , 'gender' : 'male' }
附表:各种比较符号
符号
含义
示例
$lt
小于
{‘age’: {‘$lt’: 20}}
$gt
大于
{‘age’: {‘$gt’: 20}}
$lte
小于等于
{‘age’: {‘$lte’: 20}}
$gte
大于等于
{‘age’: {‘$gte’: 20}}
$ne
不等于
{‘age’: {‘$ne’: 20}}
$in
在范围内
{‘age’: {‘$in’: [20, 23]}}
$nin
不在范围内
{‘age’: {‘$nin’: [20, 23]}}
在查询条件中加入功能符号进行查询,以下代码用正则匹配实现了对名字以 T 开头的学生数据的查询:
1 2 3 4 5 6 7 8 import pymongoclient = pymongo.MongoClient(host='localhost' , port=27017 ) db = client.spiders collection = db.students results = collection.find({'name' : {'$regex' : '^T.*' }}) for result in results: print(result)
查询结果:
1 {'_id' : ObjectId('5d6f95d40828142f1dc35fa5' ), 'id' : '17110105' , 'name' : 'TRHX' , 'age' : 20 , 'gender' : 'male' }
附表:各种功能符号
符号
含义
示例
示例含义
$regex
匹配正则表达式
{‘name’: {‘$regex’: ‘^T.*’}}
name 以 T 开头
$exists
属性是否存在
{‘name’: {‘$exists’: True}}
name 属性存在
$type
类型判断
{‘age’: {‘$type’: ‘int’}}
age 的类型为 int
$mod
数字模操作
{‘age’: {‘$mod’: [5, 0]}}
年龄模 5 余 0
$text
文本查询
{‘$text’: {‘$search’: ‘Mike’}}
text 类型的属性中包含 Mike 字符串
$where
高级条件查询
{‘$where’: ‘obj.fans_count == obj.follows_count’}
自身粉丝数等于关注数
其他操作:https://docs.mongodb.com/manual/reference/operator/query/
【11.7】数据计数 调用 count() 方法可以统计查询结果有多少条数据,输出结果为一个整数:
1 2 3 4 5 6 7 import pymongoclient = pymongo.MongoClient(host='localhost' , port=27017 ) db = client.spiders collection = db.students result = collection.find({'name' : {'$regex' : '^T.*' }}).count() print(result)
【11.8】数据排序 调用 sort() 方法,向其传入排序的字段及升降序标志即可完成排序:
1
2
3
4
5
6
7
8
9
import pymongoclient = pymongo.MongoClient(host='localhost' , port=27017 ) db = client.spiders collection = db.students ascending = collection.find().sort('name' , pymongo.ASCENDING) descending = collection.find().sort('name' , pymongo.DESCENDING) print('升序排列:' , [result['name' ] for result in ascending]) print('降序排列:' , [result['name' ] for result in descending])
输出结果:
1 2 升序排列: ['AAA' , 'BBB' , 'CCC' , 'TRHX' ] 降序排列: ['TRHX' , 'CCC' , 'BBB' , 'AAA' ]
【11.9】数据偏移 利用 skip() 方法偏移几个位置,就可以跳过前几条数据,获取偏移量之后的几个数据;利用 limit() 方法指定获取前几条数据:
1 2 3 4 5 6 7 8 9 import pymongoclient = pymongo.MongoClient(host='localhost' , port=27017 ) db = client.spiders collection = db.students ascending = collection.find().sort('name' , pymongo.ASCENDING).skip(1 ) descending = collection.find().sort('name' , pymongo.DESCENDING).limit(2 ) print('升序排列(偏移量为1,获取后三条数据):' , [result['name' ] for result in ascending]) print('降序排列(限制获取前两条数据):' , [result['name' ] for result in descending])
输出结果:
1 2 升序排列(偏移量为1 ,获取后三条数据): ['BBB' , 'CCC' , 'TRHX' ] 降序排列(限制获取前两条数据): ['TRHX' , 'CCC' ]
【11.10】更新数据 使用 update() 方法,指定更新的条件和更新后的数据即可:
1 2 3 4 5 6 7 8 9 10 import pymongoclient = pymongo.MongoClient(host='localhost' , port=27017 ) db = client.spiders collection = db.students condition = {'name' : 'TRHX' } student = collection.find_one(condition) student['age' ] = 18 result = collection.update(condition, student) print(result)
该代码将 name 为 TRHX 的 age 改为了 18,返回结果仍然是字典形式,ok 代表执行成功,nModified 代表影响的数据条数:
1 {'n' : 1 , 'nModified' : 1 , 'ok' : 1.0 , 'updatedExisting' : True }
进阶操作:使用 $set 操作符对数据进行更新,指定更新的条件和更新后的数据即可,这样做的好处是:只更新指定的 student 字典内存在的字段,如果原先还有其他字段,则不会更新,也不会删除;如果不用 $set ,则会把之前的数据全部用 student 字典替换,如果原本存在其他字段,则会被删除
1 2 3 4 5 6 7 8 9 10 import pymongoclient = pymongo.MongoClient(host='localhost' , port=27017 ) db = client.spiders collection = db.students condition = {'name' : 'TRHX' } student = collection.find_one(condition) student['age' ] = 18 result = collection.update(condition, {'$set' : student}) print(result)
和插入数据的 insert() 方法一样,在 PyMongo 3.x 版本里,推荐使用 update_one() 和 update_many() 方法
1 2 3 4 5 6 7 8 9 10 11 import pymongoclient = pymongo.MongoClient(host='localhost' , port=27017 ) db = client.spiders collection = db.students condition = {'name' : 'TRHX' } student = collection.find_one(condition) student['age' ] = 19 result = collection.update_one(condition, {'$set' : student}) print(result) print(result.matched_count, result.modified_count)
注意:update_one() 方法不能直接传入修改后的字典,只能使用 {'$set': student} 的形式传入,可以调用 matched_count 和 modified_count 属性,获取匹配的数据条数和影响的数据条数:
1 2 <pymongo.results.UpdateResult object at 0x00000235A1684508 > 1 1
使用update_many() 方法可以将所有符合条件的数据都更新:
1 2 3 4 5 6 7 8 9 import pymongoclient = pymongo.MongoClient(host='localhost' , port=27017 ) db = client.spiders collection = db.students condition = {'age' : {'$gt' : 18 }} result = collection.update_many(condition, {'$set' : {'age' : 25 }}) print(result) print(result.matched_count, result.modified_count)
匹配所有年龄大于 18 的数据,更新条件为将这些所有满足条件的年龄都设置成 25,输出结果如下:
1 2 <pymongo.results.UpdateResult object at 0x00000285CECC45C8 > 4 4
【11.11】删除数据 调用 remove() 方法并指定删除的条件,此时符合条件的所有数据均会被删除
1 2 3 4 5 6 7 import pymongoclient = pymongo.MongoClient(host='localhost' , port=27017 ) db = client.spiders collection = db.students result = collection.remove({'name' : 'CCC' }) print(result)
输出结果:
同样的,在 PyMongo 3.x 版本里,推荐使用 delete_one() 和 delete_many() 方法
1 2 3 4 5 6 7 8 9 10 import pymongoclient = pymongo.MongoClient(host='localhost' , port=27017 ) db = client.spiders collection = db.students result = collection.delete_one({'name' : 'AAA' }) print(result) print(result.deleted_count) result = collection.delete_many({'gender' : 'female' }) print(result.deleted_count)
调用 deleted_count 属性可以获取删除的数据条数,输出结果:
1 2 3 <pymongo.results.DeleteResult object at 0x0000024441B245C8 > 1 1
PyMongo 官方文档:http://api.mongodb.com/python/current/api/pymongo/collection.html